1.2. 工具链说明
本章简要介绍,在为龙芯架构开发系统内核时,使用的编译工具链。
其中,工具链具体原理与详细说明,请以文档第二章为主。
1.2.1. GCC
1、龙芯生态的新世界与旧世界。
龙芯在刚开始发布LoongArch时,为了兼容以前的MIPS,开发了新的一套二进制接口规范,我们称为“旧世界”。
后来和社区的努力提出了新的ABI接口规范,我们称为“新世界”。
新世界增加了更多的LoongArch架构特性,两个世界并不兼容。一般而言,开发者需要使用一整套同一个世界的工具链。
旧世界只是一个中间过渡的产品,目前LoongArch的所有生态都向着新世界看齐,已经全部转入新世界。
具体版本信息可查看上游主线!
2、编译器选项
编译器支持两类命令行选项。
基础选项:选择编译目标的基本配置,包括 -march -mabi -mtune;
扩展选项:对基础选项或基础选项默认值的配置进行增量调整。
基础选项内容与可选值如下:
选项 |
可用值 |
描述 |
|---|---|---|
-march= |
native,loongarch64,la464 |
设定可用的指令集和寄存器范围 |
-mabi= |
lp64d,lp64f,lf64s,ilp32d,ilp32f,ilp32s |
选择基础ABI类型 |
-mtune= |
native,loongarch64,la464 |
设定与架构相关的性能调优参数 |
扩展选项内容与可选值如下:
选项 |
可用值 |
描述 |
|---|---|---|
-msoft-float |
禁止使用浮点指令,ABI使用软浮点类型(后缀为s) |
|
-msingle-float |
允许使用32位浮点指令,ABI使用32位浮点类型(后缀为f) |
|
-mdouble-float |
允许使用32位和64位浮点指令,ABI使用64位浮点类型(后缀为d) |
|
-mfpu= |
64,32,0,none |
选择可用的浮点指令和浮点寄存器范围。 |
3、musl和glibc
针对不同的ABI,其支持的 C 库,与对应架构标识符,如下所示:
ABI类型/扩展特性 |
C库 |
架构标识符 |
|---|---|---|
lp64d/base |
glibc |
loongarch64-linux-gnu |
lp64f/base |
glibc |
loongarch64-linux-gnuf32 |
lp64s/base |
glibc |
loongarch64-linux-gnusf |
lp64d/base |
musl,libc |
loongarch64-linux-musl |
lp64f/base |
musl,libc |
loongarch64-linux-muslf32 |
lp64s/base |
musl,libc |
loongarch64-linux-muslsf |
1.2.2. LLVM
LLVM 是如今设计和开发编译器的最重要的框架之一,它不仅提供了知名的 C/C++ 编译器前端 clang,也为 Rust 等许多其他编程语言提供了编译框架支持,包括 Chromium 在内的大量大型软件都采用 LLVM 作为编译构建工具。
LLVM 自 16.0.0 版本开始,以正式后端(official target)的级别实现了对 LoongArch 指令集架构的完善支持。
LoongArch 架构在整个 LLVM 项目中得到了更加全面的支持,可支持 OrcJIT、GHC 调用约定等高级特性,clang、compiler-rt、lldb、openmp 和 libunwind 等子项目。
1.2.3. Rust
Rust 是近年来新兴的系统级编程语言,专注于安全性、并发性和性能。Rust 拥有丰富的类型系统和所有权模型,可通过在编译时检查内存访问和并发问题,保证内存安全和线程安全。Rust 在构建并行和分布式应用程序时具有优良的并发性能,其高性能特性使 Rust 适用于编写高效的系统软件,如操作系统内核、嵌入式设备驱动程序和网络服务器。
Rust 自 1.71.0 版本开始,将对 LoongArch 架构的支持提升到 Tier2 级别,这一进展标志着 Rust 开源社区与其它主流指令集架构一样,将原生构建并发布针对 LoongArch 架构的二进制版本,实现对 LoongArch 指令集的原生支持。
目前 Rust 支持的 LoongArch Linux 目标平台,包括:loongarch64-unknown-linux-gnu 与 loongarch64-unknown-linux-musl , 支持原生构建和交叉构建,可通过 rustup 管理使用。
1.3. 模拟器
1.3.1. QEMU
QEMU 是一个通用且开源的机器模拟器和虚拟化程序,可以运行为特定机器(例如 Loongson 3A5000 )编写的操作系统和程序,在不同的机器(例如 x86 PC)上运行。
同事,通过使用动态翻译,QEMU 可以使用 Xen 或 KVM 等其他虚拟机监控程序来利用 CPU 扩展(HVM)进行虚拟化。
这样,运行操作系统和程序时,QEMU 通过在主机 CPU 上直接执行客户机代码来实现接近原生的性能,达到良好性能。
QEMU 提供全系统仿真和用户模式仿真两种模式。
全系统仿真:QEMU 模拟一个完整的系统,包括一个或多个处理器和各种外围设备。它更准确但速度较慢。
用户模式仿真:QEMU 能够通过利用主机系统资源,运行不同架构编译的 Linux 可执行文件。
在 x86 平台设备,或 LoongArch 平台上,安装支持 LoongArch 架构模拟的 QEMU,教程如下:
可使用以下命令,安装社区或发行版维护的预编译版本:
#  在 Ubuntu/Deepin 系统系统上通过 apt 进行安装
sudo apt update
sudo apt install qemu-system-loongarch64 qemu-utils
使用这种方式安装预编译版本,可开箱即用,但 QEMU 版本可能较为落后。
可使用源码编译方式,进行安装:
#  安装依赖
sudo apt-get install libglib2.0-0 libglib2.0-dev
sudo apt install libpixman-1-0 libpixman-1-dev
sudo apt install flex
sudo apt install bison ninja-build
sudo apt install gcc g++
#  克隆官方仓库
git clone https://github.com/qemu/qemu.git
#  开始安装
cd qemu/
mkdir build
cd build
../configure --target-list=loongarch64-softmmu --enable-kvm --disable-werror --enable-vnc --enable-debug --enable-gdb
#  如果有需求,请添加 sudo 权限
make
make install
即可成功安装 QEMU 。
QEMU 启动运行时,支持的参数选项包括:
qemu-system-loongarch64 \
  -m 8G \      #  指定分配内存大小
  -cpu la464-loongarch-cpu \     #  指定模拟 CPU 型号
  -machine virt \       #  指定模拟硬件凭条
  -smp 4 \        #  指定 CPU 核心数
  -bios ./QEMU_EFI.fd \       #  指定 BIOS 用于启动时加载和执行
  -device virtio-gpu-pci \       #  指定 GPU 设备
  -hda ./Loongnix-20.5.loongarch64.qcow2     #  指定虚拟机的硬盘镜像
1.3.2. LA_EMU
LA_EMU 为 LoongArch64 模拟器,支持整型、浮点、向量指令集。模拟器能够启动 Linux kernel,并运行大型测试。
可使用以下命令进行安装:
#  克隆官方仓库
git clone https://github.com/Open-ChipHub/LA_EMU.git
#  编译
make
编译完成后,在 build/目录下,生成两个可执行程序:la_emu_kernel与la_emu_user,分别支持系统模式仿真和用户模式仿真。
LA_EMU 启动运行时,支持的参数选项包括:
la_emu_kernel -m n[G] -k kernel
-m Memory size(kernel mode)
-k Kernel vmlinux or checkpoint directory(kernel mode)
-d Log info, support: exec,cpu,fpu,int
-D Log file
-c Check item, support: tlb_mhit
-z Determined events
-g Enable gdbserver
-w Force enable hardware page table walker
系统模式下,LA_EMU 常用运行命令如下:
./build/la_emu_kernel -w -z -n -m 8 -k ~/linux/vmlinux
该命令可在 LA_EMU 系统模式下,启动 Linux kernel。
1.4. 操作系统编译
本章以多个开源操作系统为示例,展示LoongArch架构的操作系统编译详细步骤,并在 x86 平台 QEMU 上启动。
首先准备启动系统需要的 bios 固件,可通过以下指令下载编译好的版本:
wget https://raw.githubusercontent.com/Open-ChipHub/LoongArch-SDK/refs/heads/main/bios/QEMU_EFI.fd
或者,可使用以下命令,手动编译。
安装交叉编译器
wget https://github.com/loongson/build-tools/releases/download/2023.08.08/x86_64-cross-tools-loongarch64-gcc-libc.tar.xz
tar xvf ./x86_64-cross-tools-loongarch64-gcc-libc.tar.xz
#  set env
export CROSS_COMPILE=loongarch64-unknown-linux-gnu-
#  replace your real path of cross compiler with {/path/of/cross/compile}
export PATH={/path/of/cross/compile}/bin:$PATH
使用以下命令检查软件安装情况:
loongarch64-unknown-linux-gnu-gcc --version
#  print version on terminal.
下载仓库并初始化
git clone https://github.com/tianocore/edk2.git
#  初始化
cd edk2
git submodule update --init
开始构建
make -C BaseTools
build -a LOONGARCH64 -t GCC5 -p OvmfPkg/LoongArchVirt/LoongArchVirtQemu.dsc
编译完成后,固件映像位于 Build/LoongArchPkg/DEBUG_GCC5/FV/ 目录下。
1.4.1. LoongNix
使用以下命令,下载 Loongnix 社区预编译系统:
wget https://pkg.loongnix.cn/loongnix/isos/Loongnix-20.3/Loongnix-20.3.mate.gui.loongarch64.en.qcow2
使用以下命令,启动 Loongnix 系统:
qemu-system-loongarch64 -m 8G -cpu la464 -machine virt -smp 4 \
   -bios ../QEMU_EFI.fd -serial stdio \
   -device virtio-gpu-pci -net nic \
   -device nec-usb-xhci,id=xhci,addr=0x1b \
   -device usb-tablet,id=tablet,bus=xhci.0,port=1 \
   -device usb-kbd,id=keyboard,bus=xhci.0,port=2  \
   -hda ./Loongnix-20.3.mate.gui.loongarch64.cn.qcow2
可在 QEMU 界面看到如下选项。
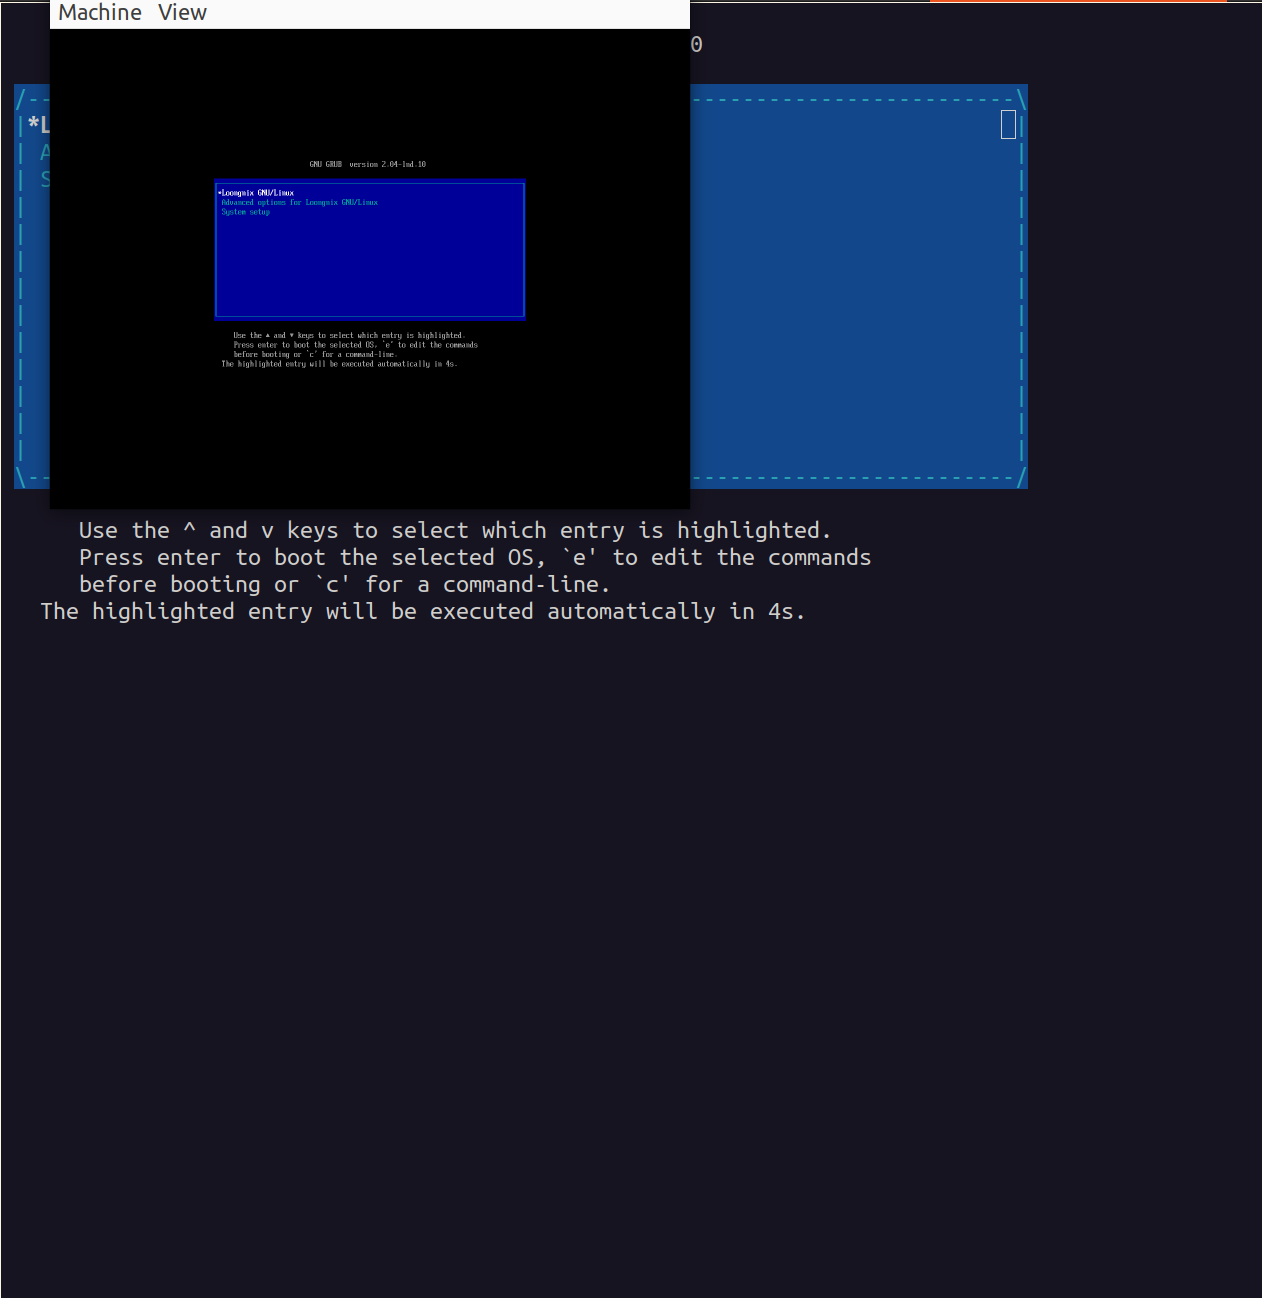
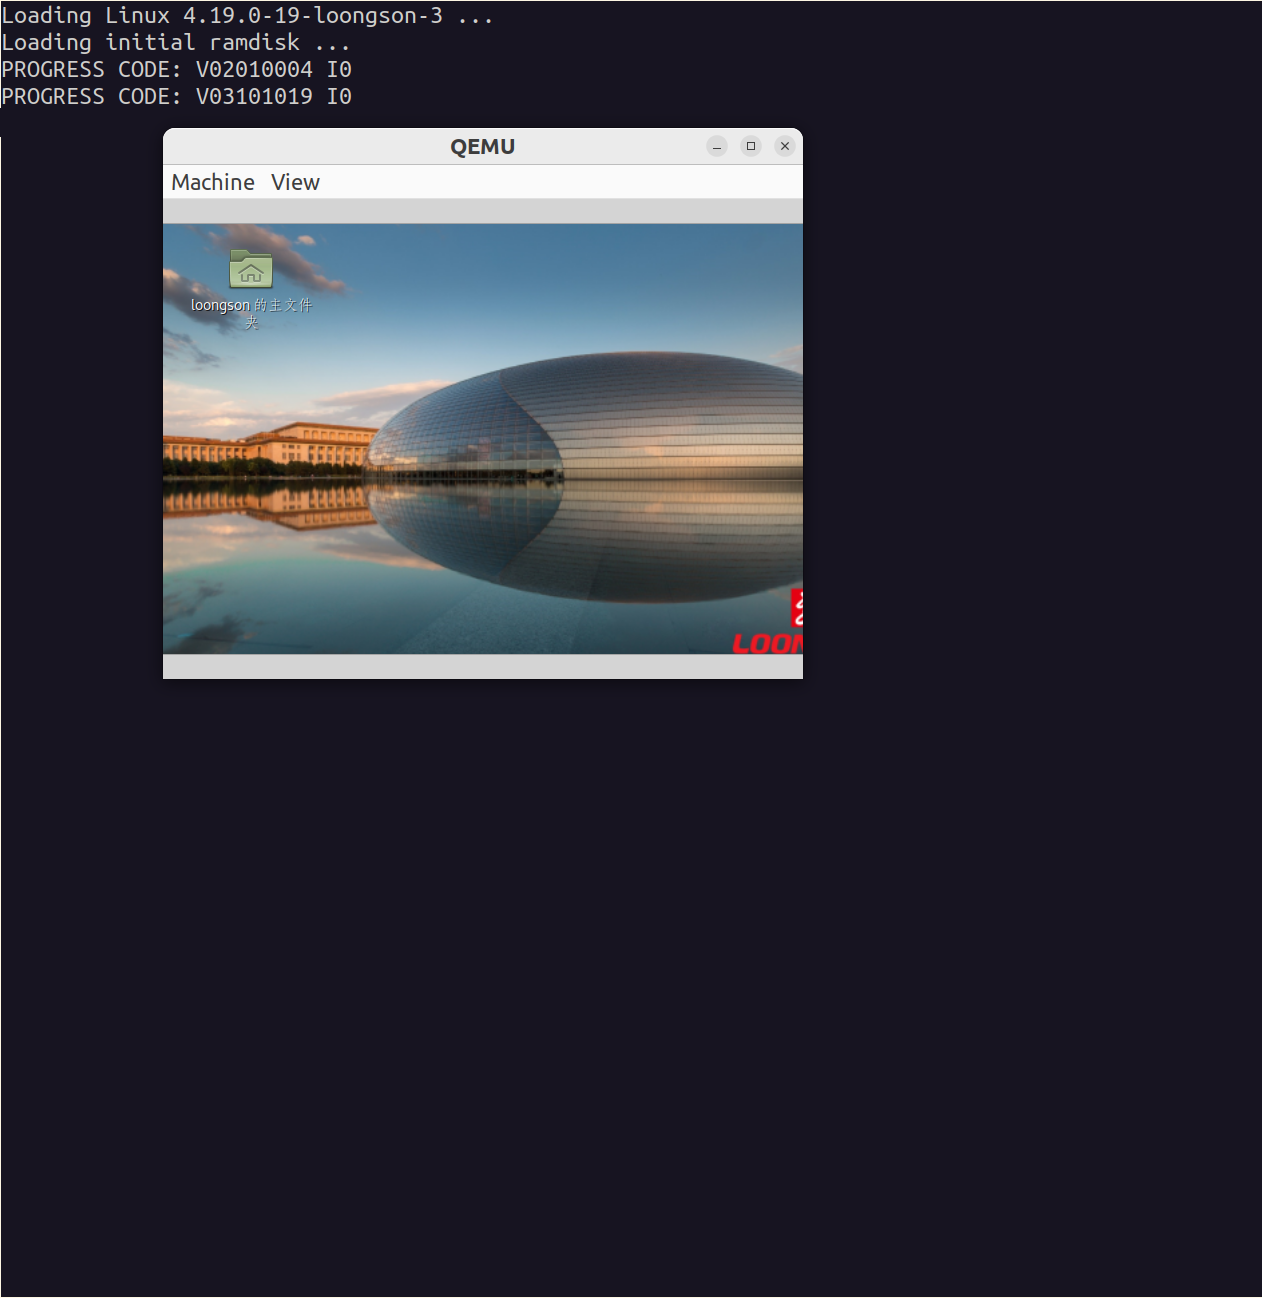
点击回车键,可进入系统登录界面。

输入密码 Loongson20 ,即可进入主界面。
1.4.2. Deepin
下载 Deepin 安装镜像,可使用以下命令:
wget https://mirrors.hust.edu.cn/deepin-cd/25.0.10/loong64/deepin-desktop-community-25.0.10-loong64.iso
创建虚拟机磁盘。
首先创建一个 100GB 大小的磁盘,可使用以下命令:
/emulator/qemu/bin/qemu-img create -f qcow2 ./deepin.qcow2 100G
运行一下命令,启动系统:
qemu-system-loongarch64 \
      -m 4G \
      -cpu la464 \
      -M virt \
      -smp 4 \
      -bios ../uefi/QEMU_EFI.fd \
      -device virtio-gpu-pci \
      -net nic  \
      -device nec-usb-xhci,id=xhci,addr=0x1b \
      -device usb-tablet,id=tablet,bus=xhci.0,port=1 \
      -device usb-kbd,id=keyboard,bus=xhci.0,port=2 \
      -drive file=deepin.qcow2,format=qcow2,if=virtio \
      -cdrom deepin-desktop-community-25.0.10-loong64.iso
可在 QEMU 界面看到如下选项。
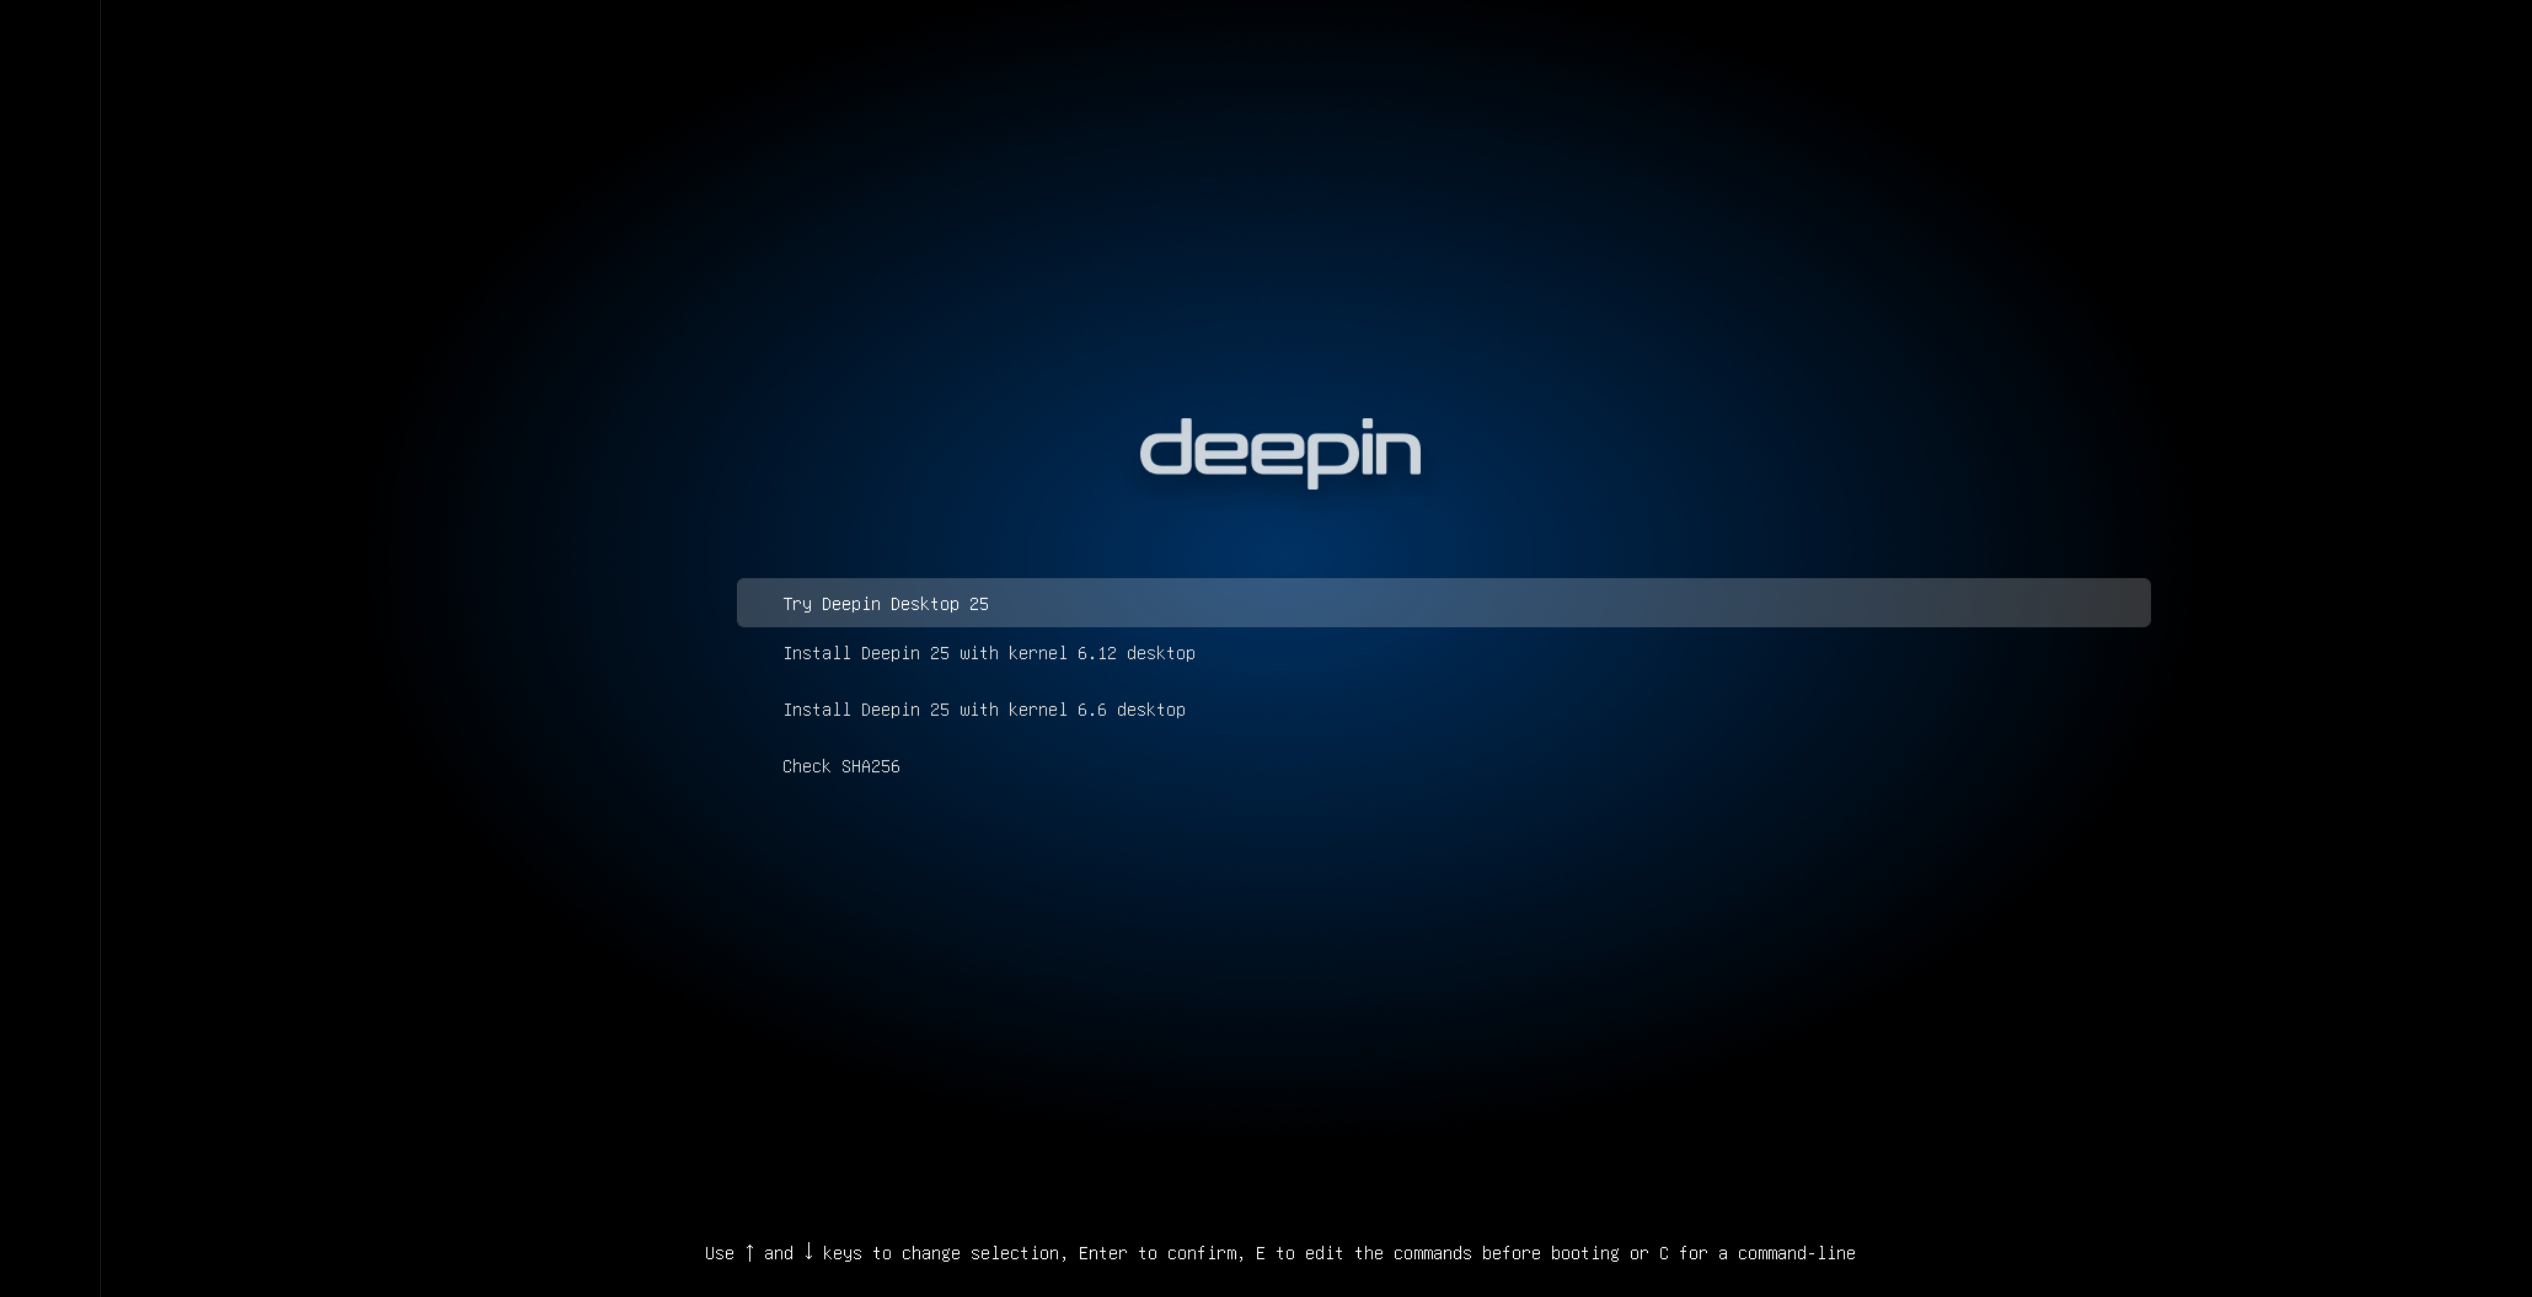
点击回车键,可选择[Try Deepin Desktop 25],进入系统进行体验。
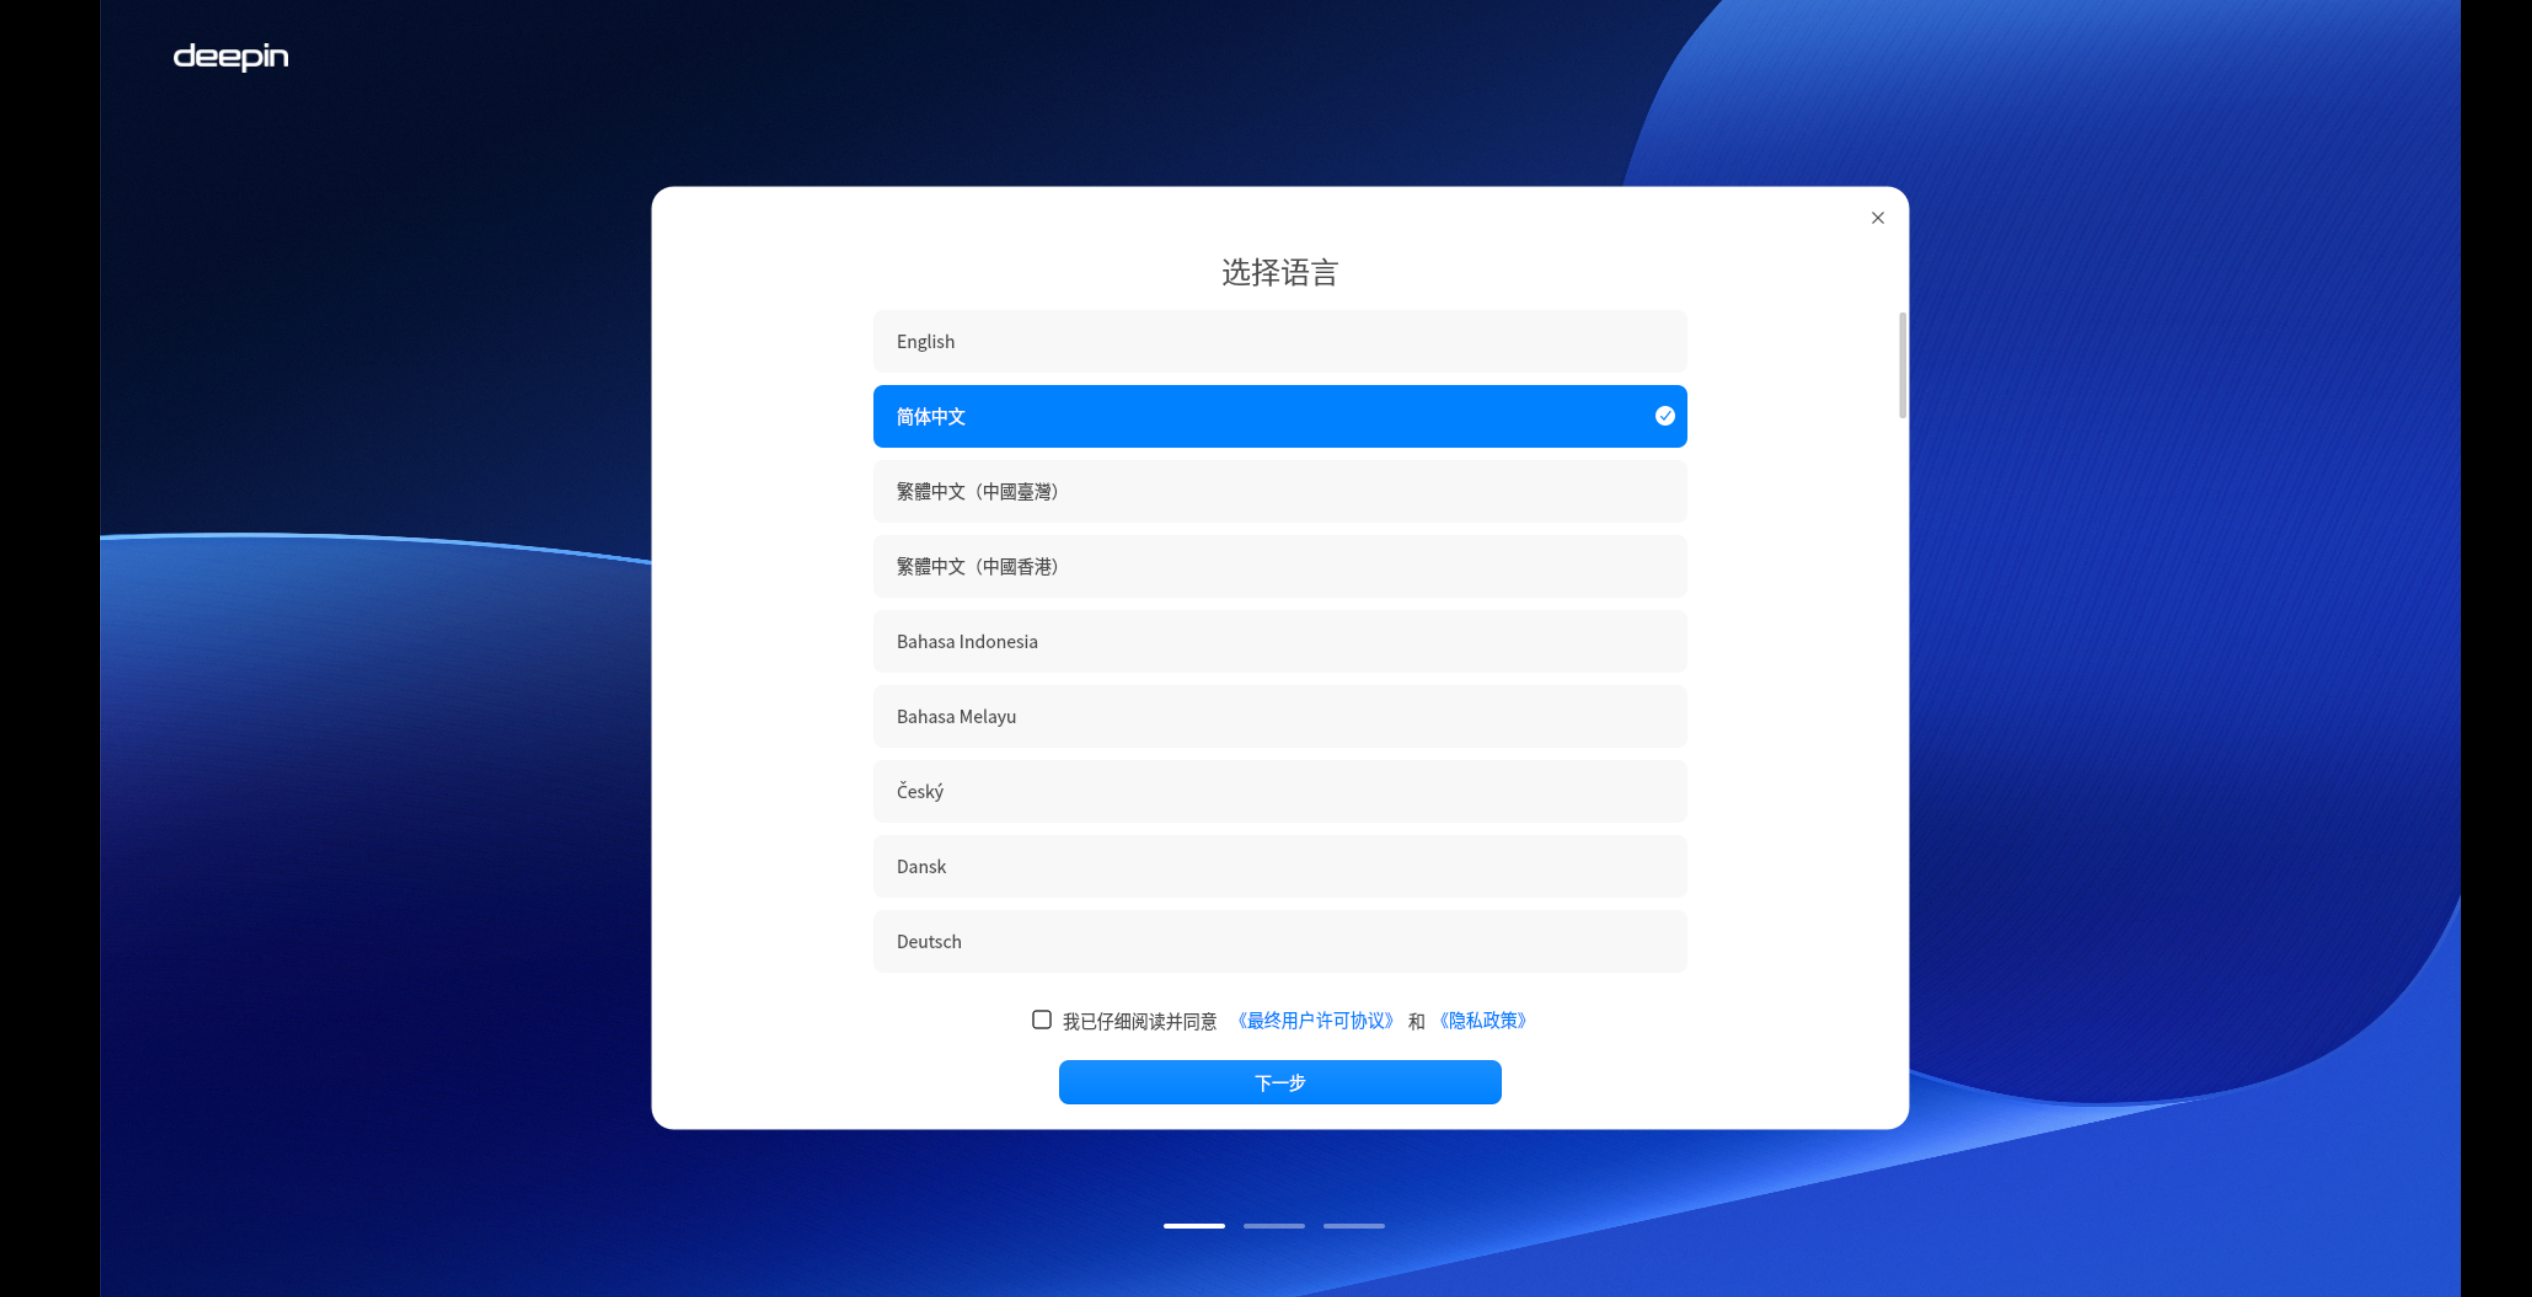
点击方向键,即可进入主界面。


请注意,在当前操作下,对系统进行的任何更改,将不会保存。
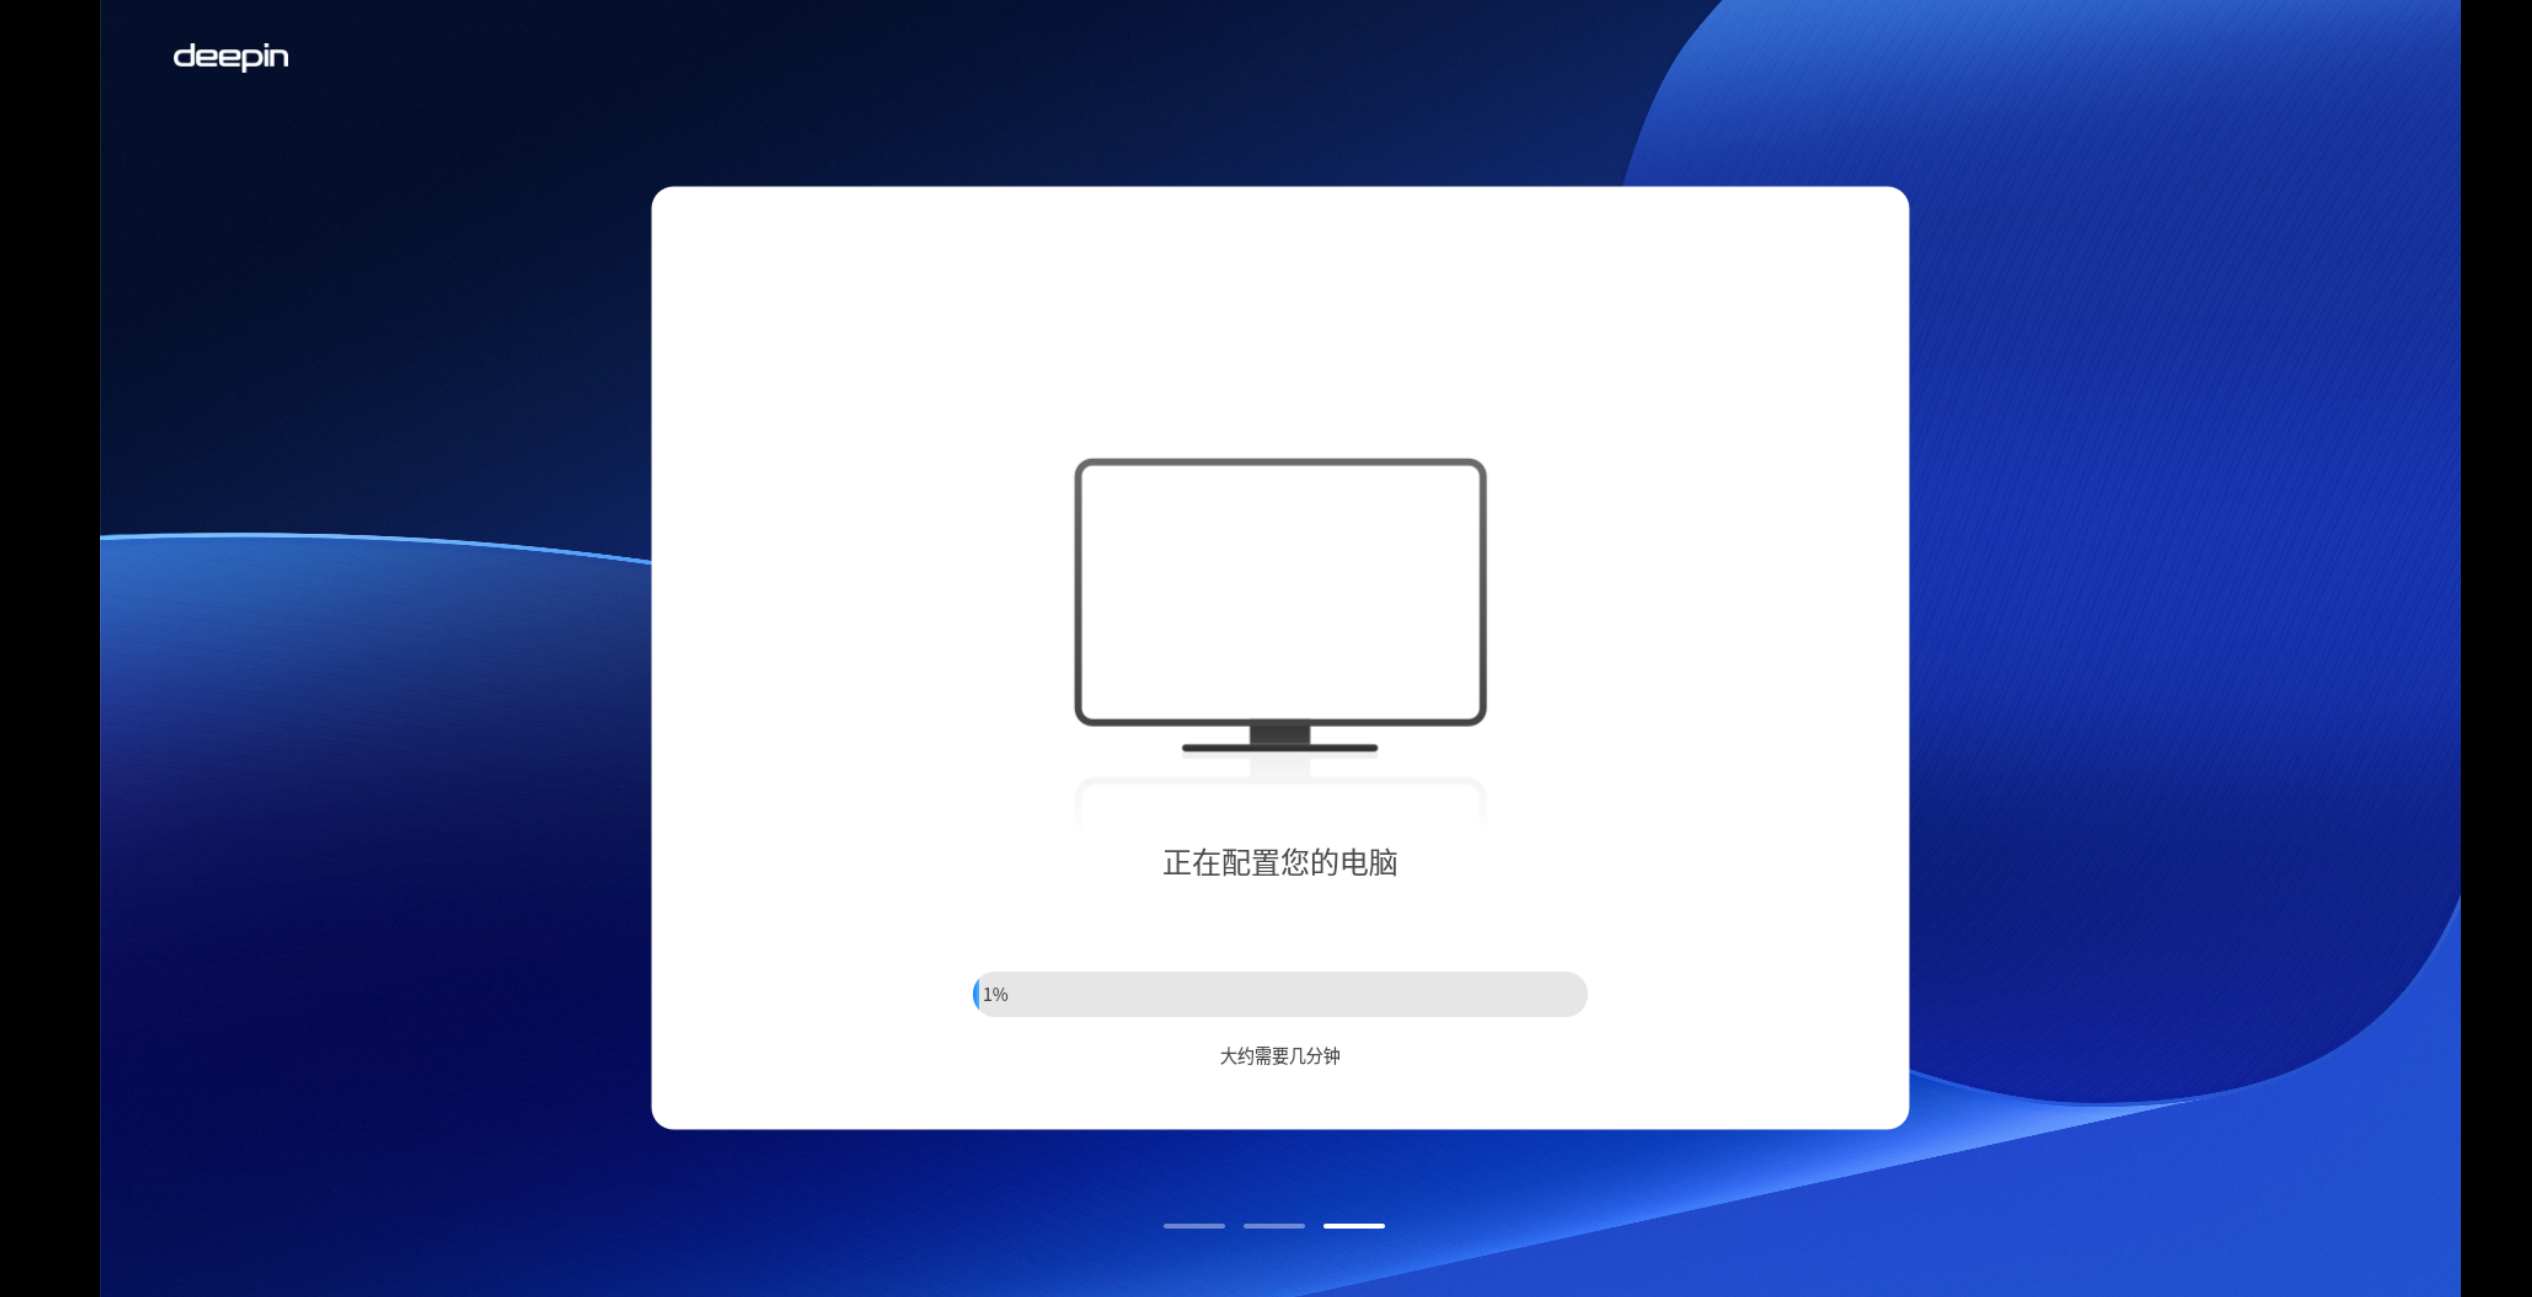
也可以在QEMU界面中选择[Install Deepin 25],按照系统指引进行安装即可。
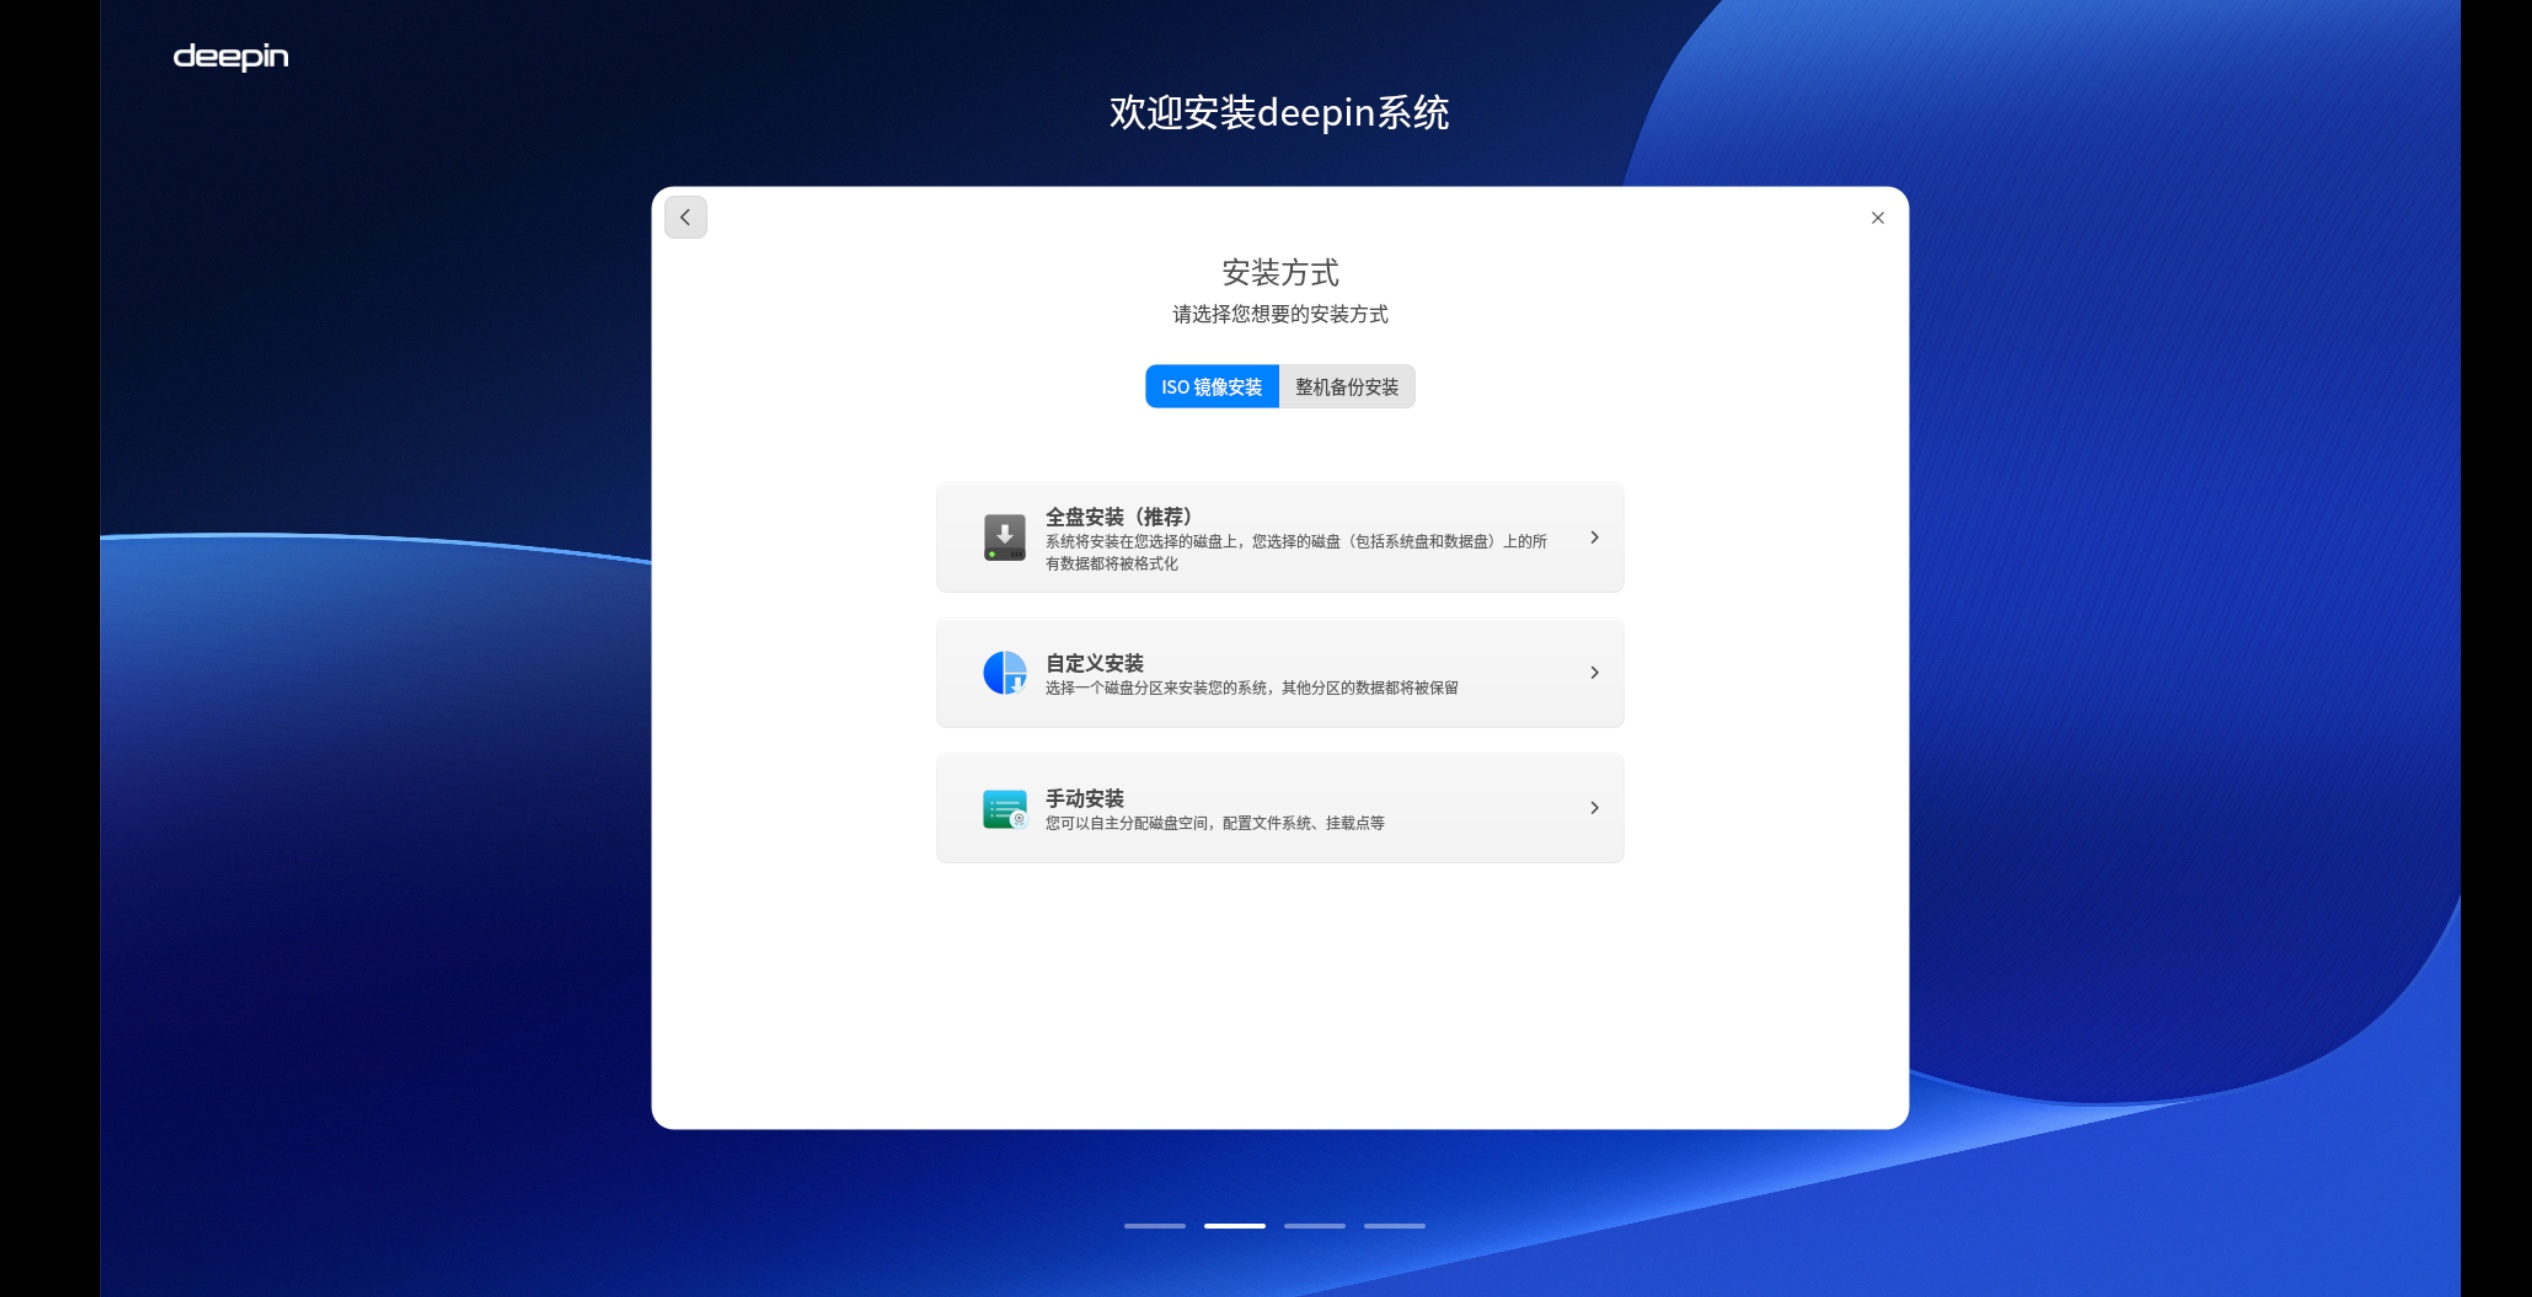
安装后,可以系统进行进行更改,所有更改操作都将会保存。
1.4.3. AOSC(安同)
在终端中运行该指令下载安同os镜像:
$ wget https://releases.aosc.io/os-loongarch64/installer/aosc-os_installer_20251206_loongarch64.iso
创建映像文件
在虚拟机终端中运行如下命令,建立一个 20GiB 大小的硬盘映像文件 aosc.img 供qemu挂载使用
$ sudo qemu-img create -f raw aosc.img 20G
为映像文件建立分区
随后为 aosc.img 建立分区
$ sudo fdisk aosc.img

Welcome to fdisk (util-linux 2.37.2).
Changes will remain in memory only, until you decide to write them.
Be careful before using the write command.

Device does not contain a recognized partition table.
Created a new DOS disklabel with disk identifier 0x0f513192.

Command (m for help): n
Partition type
   p   primary (0 primary, 0 extended, 4 free)
   e   extended (container for logical partitions)
Select (default p): p
Partition number (1-4, default 1): 1
First sector (2048-41943039, default 2048):
Last sector, +/-sectors or +/-size{K,M,G,T,P} (2048-41943039, default 41943039):

Created a new partition 1 of type 'Linux' and of size 20 GiB.

Command (m for help): w
The partition table has been altered.
Syncing disks.
打印目前的分区表
$ fdisk -l aosc.img

Disk aosc.img: 20 GiB, 21474836480 bytes, 41943040 sectors
Units: sectors of 1 * 512 = 512 bytes
Sector size (logical/physical): 512 bytes / 512 bytes
I/O size (minimum/optimal): 512 bytes / 512 bytes
Disklabel type: dos
Disk identifier: 0xe25655f6

Device     Boot Start      End  Sectors Size Id Type
aosc.img1        2048 41943039 41940992  20G 83 Linux
创建Makefile文件
创建一个Makefile文件
$ vim Makefile
在其中编写
QEMU  = /your/qemu/path/qemu-system-loongarch64
MEM   = 4G
CORES = 4
CPU   = la464
MACH  = virt
BIOS  = /your/EFI.fd/path/QEMU_EFI.fd

DISK  = aosc.img
# ISO名字可能会随着版本变化而改变,更改为最新下载版本的名字即可
ISO   = aosc-os_installer_20251206_loongarch64.iso

.PHONY: run run-hd create clean

run:
        $(QEMU) -m $(MEM) -smp $(CORES) -cpu $(CPU) -machine $(MACH) -bios $(BIOS) \
                -serial stdio -device virtio-gpu-pci -net nic -net user \
                -device virtio-blk-pci,drive=drive-virtio-disk0 \
                -drive id=drive-virtio-disk0,if=none,format=raw,file=$(DISK) \
                -device virtio-scsi-pci,id=scsi0 \
                -drive id=drive-scsi0-cdrom0,if=none,format=raw,readonly=on,file=$(ISO) \
                -device scsi-cd,bus=scsi0.0,drive=drive-scsi0-cdrom0

run-hd:
        $(QEMU) -m $(MEM) -smp $(CORES) -cpu $(CPU) -machine $(MACH) -bios $(BIOS) \
                -serial stdio -device virtio-gpu-pci -net nic -net user \
                -drive file=$(DISK),format=raw,if=virtio

create:
        qemu-img create -f raw $(DISK) 20G

clean:
        rm -f $(DISK)
使用qemu运行安同os
此时文件夹下有三个文件,分别是:
aosc.img
aosc-os_installer_20251206_loongarch64.iso
Makefile
使用sudo make run命令运行
屏幕上会弹出安同os的界面
如果无法在安同os界面操作,那就返回到终端中进行操作选择
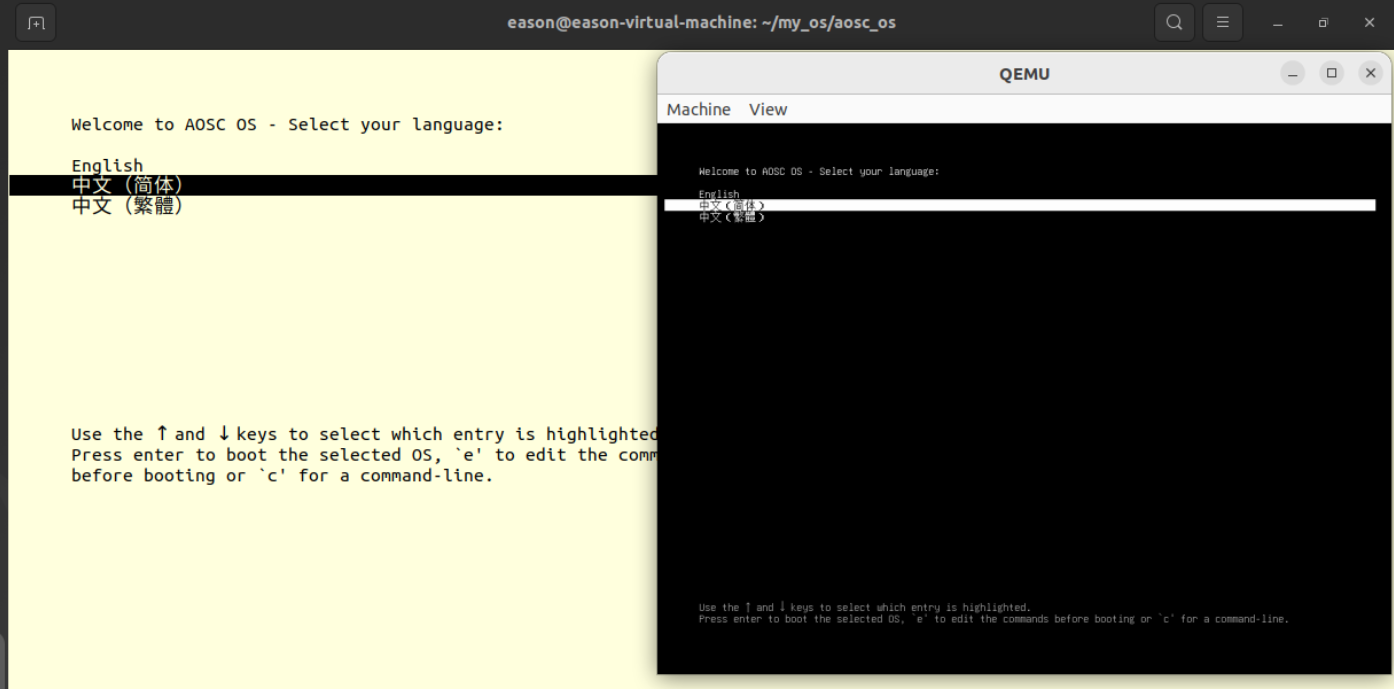
第一个界面选择 中文(简体)
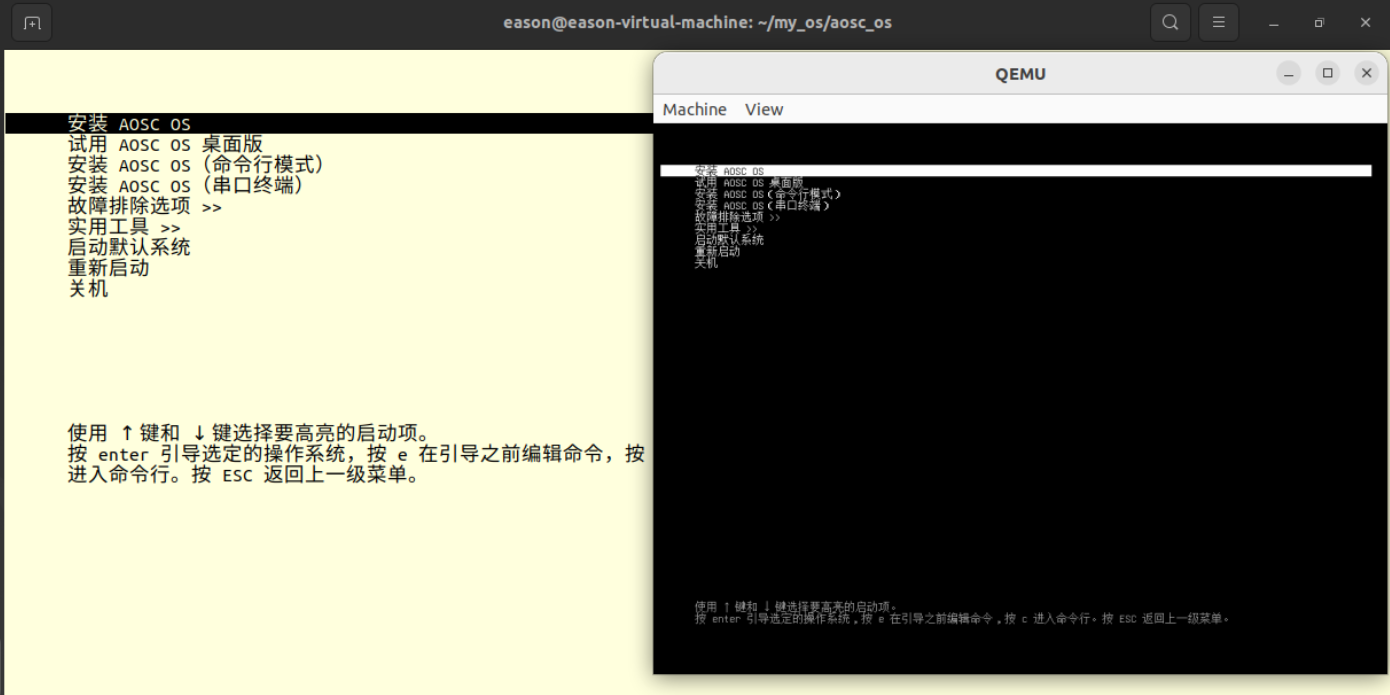
第二个界面选择 试用AOSC OS桌面版
稍等片刻即可进入安同os桌面

1.4.4. Linux kernel
linux内核版本推荐6.10。
首先,基于busybox制作最小根文件系统。
可使用以下命令获取对应文件。
wget https://github.com/Open-ChipHub/LoongArch-SDK/raw/refs/heads/main/rootfs/rootfs.cpio.gz
mv ./rootfs.cpio.gz /path/to/your/linux/directory/
也可使用以下命令,重新制作。
首先获取busybox。
# 下载tar包
wget https://busybox.net/downloads/busybox-1.33.0.tar.bz2
tar -xjf ./busybox-1.33.0.tar.bz2
cd busybox-1.33.0
# 或从git仓库下载
git clone git://git.busybox.net/busybox
cd busybox
使用以下命令进行编译。
# 安装依赖
sudo apt install libncurses5-dev ncurses-devel
make arch=loongarch CROSS_COMPILE=loongarch64-linux-gnu- defconfig
make arch=loongarch CROSS_COMPILE=loongarch64-linux-gnu- menuconfig
# 根据需求进行配置
make -j$(nproc)
# 生成到新建目录rootfs
make install CONFIG_PREFIX={/path/to/rootfs}
在rootfs目录下,进行以下命令。
cd {/path/to/rootfs}
mkdir -p proc sys dev etc/init.d
vim etc/init.d/rcS
修改etc/init.d/rcS为以下内容
mount -t proc none /proc
mount -t sysfs nont /sys
exec /bin/sh
进行以下命令。
chmod +x etc/init.d/rcS
ln -sf bin/busybox init
# 打包为initramfs
find . | cpio -o -H newc | gzip > ../rootfs.cpio.gz
接下来编译linux kernel
可使用以下命令进行获取。
# 下载tar.gz包
wget https://www.kernel.org/pub/linux/kernel/v6.x/linux-6.10.tar.gz
tar zxvf linux-6.10.tar.gz -C {/path/of/linux/}
cd linux-6.10
# 或从git仓库下载
git clone https://git.kernel.org/pub/scm/linux/kernel/git/torvalds/linux.git
cd linux
git checkout v6.10
使用以下命令,配置内核对应的设备数文件,与内核配置文件。
# 可手动从github仓库下载该文件,或使用以下命令
wget https://raw.githubusercontent.com/Open-ChipHub/LoongArch-SDK/refs/heads/main/dts/labcore-sim.dts
mv ./labcore-sim.dts {path/to/linux}/arch/loongarch/boot/dts/
wget https://raw.githubusercontent.com/Open-ChipHub/LoongArch-SDK/refs/heads/main/linux/labcore_defconfig
mv ./labcore_defconfig {path/to/linux}/.config
使用以下命令,对linux kernel进行编译。
cp {path/to/rootfs/}/rootfs.cpio.gz ./
# 请确保交叉编译器环境变量设置正确
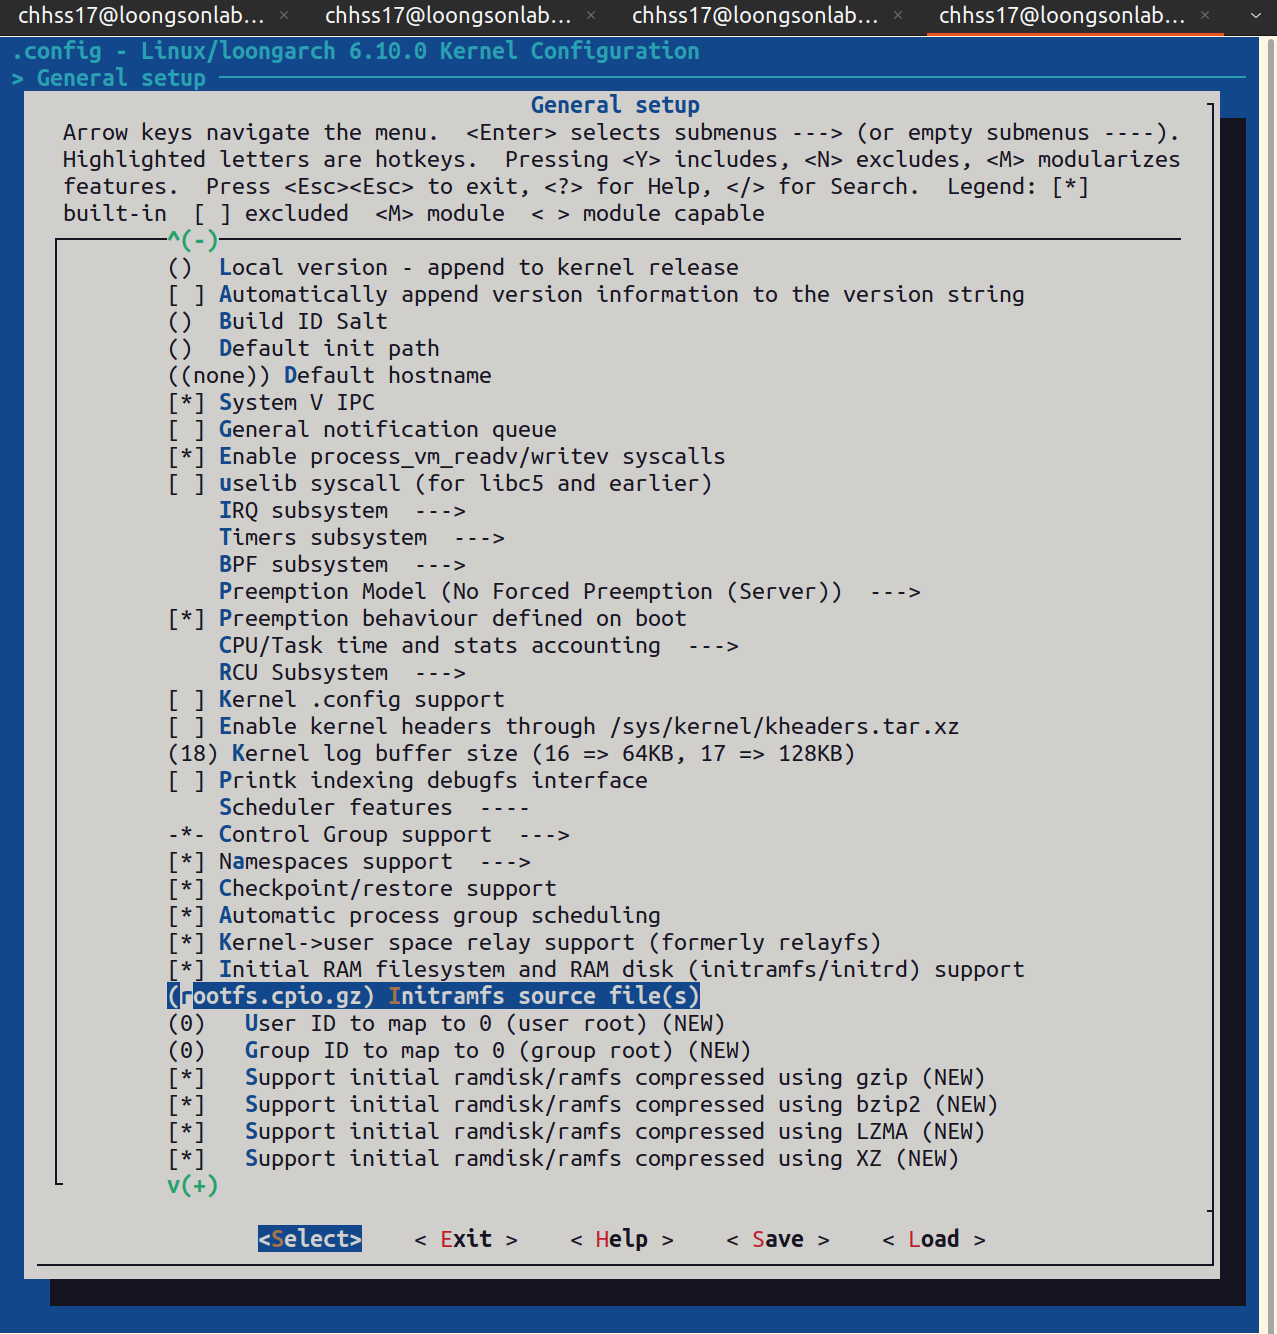
make ARCH=loongarch CROSS_COMPILE=loongarch64-linux-gnu- menuconfig
在[General setup]选项中,选择[Initial RAM filesystem and RAM disk (initramfs/initrd) support]。在[Initramfs source file(s)]中输入[rootfs.cpio.gz]。
返回上一页,在[Kernel type and options]选项中,选中[Enable built-in dtb in kernel],在[Source file for built-in dtb]中输入[labcore-sim]。

保存并退出。
使用以下命令,进行编译。
# 请确保交叉编译器环境变量设置正确
make ARCH=loongarch CROSS_COMPILE=loongarch64-linux-gnu- -j$(nproc)
部分编译过程以及结果如下所示。